Detailed Steps to Make Kani Pashmina
Kani Pashmina is a masterpiece of handloom weaving that has been perfected over centuries by skilled artisans in the Kashmir Valley. The process of making a Kani Pashmina shawl is intricate and labor-intensive, involving several detailed steps. Below is a comprehensive guide to the entire process, from sourcing the raw materials to the final finishing touches.

1. Sourcing the Raw Material: Pashmina Wool
- Collection of Wool: The process begins in the high-altitude regions of Ladakh, where the Changthangi goats, also known as Pashmina goats, are reared. These goats produce a fine, soft undercoat that is collected during the spring molting season.
- Sorting and Cleaning: The raw wool is carefully sorted to remove any coarse hair, dirt, and impurities. This is a meticulous process as the quality of the final product depends heavily on the purity and fineness of the wool.
- Carding: The cleaned wool is then carded, a process that involves combing the fibers to align them parallel to each other. This step ensures that the wool is ready for spinning into fine yarn.

2. Spinning the Pashmina Yarn
- Hand Spinning: The carded pashmina wool is spun by hand using a traditional spinning wheel called a “Charkha.” This process requires great skill and patience, as the yarn must be spun to an extremely fine gauge while maintaining its strength and softness.
- Twisting and Winding: The spun yarn is twisted to ensure it is strong enough for weaving. It is then wound onto spools or bobbins, ready to be used in the weaving process.
3. Designing the Kani Shawl
- Creation of the Talim: The design of a Kani Pashmina shawl is developed by a master craftsman known as a “Naqash.” The design is first drawn on paper, and then converted into a coded script called “Talim.” The Talim script records the number of warp threads to be lifted and the color to be used for each row, guiding the weaver through the complex pattern.
- Color Selection: The colors of the yarn are carefully chosen to match the design. Each color is wound onto a small wooden bobbin called a “Kani,” which will be used in the weaving process.
4. Warping the Loom
- Setting up the Warp: The loom is set up with warp threads, which are stretched vertically on the loom. The warp is usually made of cotton or silk, which provides strength and stability to the delicate pashmina yarn..
- Spacing the Warp: The warp threads are spaced and tensioned evenly to ensure that the fabric will be woven uniformly.
5. Weaving the Kani Pashmina Shawl
- Inserting the Weft (Kani Technique): The weft yarn, wound onto the kanis, is inserted into the warp using the Talim script as a guide. Unlike conventional weaving, where the weft is passed across the entire width of the fabric, Kani weaving involves inserting different colored threads only where needed to create the pattern.
- Interlocking the Weft: The weaver carefully interlocks the weft yarns as they are inserted, ensuring that the different colors blend seamlessly. This step requires immense skill, as the pattern is built row by row, often without a visible reference to the design.
- Shuttle Technique: For larger motifs, a shuttle is used to pass the weft through the warp threads. The weaver manually adjusts the weft tension to maintain the uniformity of the fabric.
6. Finishing the Edges
- Fringing: Once the weaving is complete, the shawl is removed from the loom, and the edges are finished. The ends of the warp threads are twisted or knotted to create a fringe, adding a decorative touch to the shawl.
- Hand Stitching: In some cases, the edges are hand-stitched to secure the weave and prevent unraveling. This is done using fine silk or cotton thread.
7. Washing and Softening
- First Wash: The shawl undergoes a gentle washing process to remove any residual oils, dirt, or dyes. This washing also softens the pashmina, enhancing its luxurious feel.
- Stretching: After washing, the shawl is carefully stretched to maintain its shape and size. This step ensures that the fabric remains even and smooth.
- Drying: The shawl is then air-dried under controlled conditions to preserve the quality of the wool.
8. Final Finishing
- Pressing: The shawl is lightly pressed to give it a smooth, polished appearance. This also helps to set the weave and ensure the fabric lies flat.
- Quality Inspection: The finished shawl undergoes a thorough inspection to check for any flaws or inconsistencies. Any loose threads or imperfections are carefully corrected by hand.

9. Embellishment (Optional)
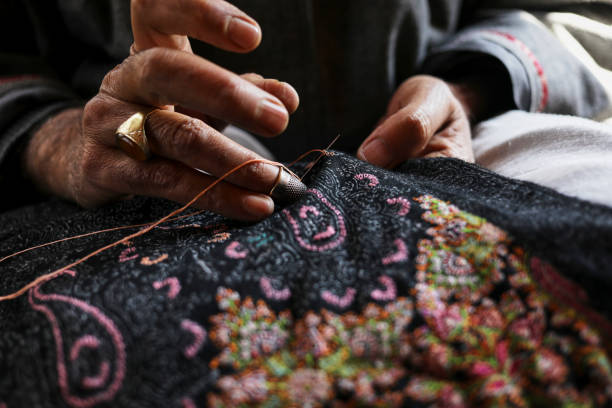
- Embroidery: Some Kani Pashmina shawls are further embellished with intricate hand embroidery, adding an extra layer of luxury and artistry. This is done by skilled artisans who specialize in traditional Kashmiri embroidery techniques such as “Sozni” or “Tilla” work.
10. Packaging
- Luxury Packaging: Once the shawl passes the final quality check, it is carefully folded and packaged. MJShawls typically uses luxury packaging to protect the shawl and present it in a way that reflects its value.
- Documentation: A certificate of authenticity is often included, detailing the origin of the pashmina and the process used to create the shawl.
11. Distribution
- Retail and Wholesale: The finished Kani Pashmina shawls are distributed to MJShawls’ outlets, luxury boutiques, and high-end retailers across India and abroad. The shawls are also made available for purchase online, where customers can appreciate the detailed craftsmanship through high-resolution images and descriptions.
Leave a Reply